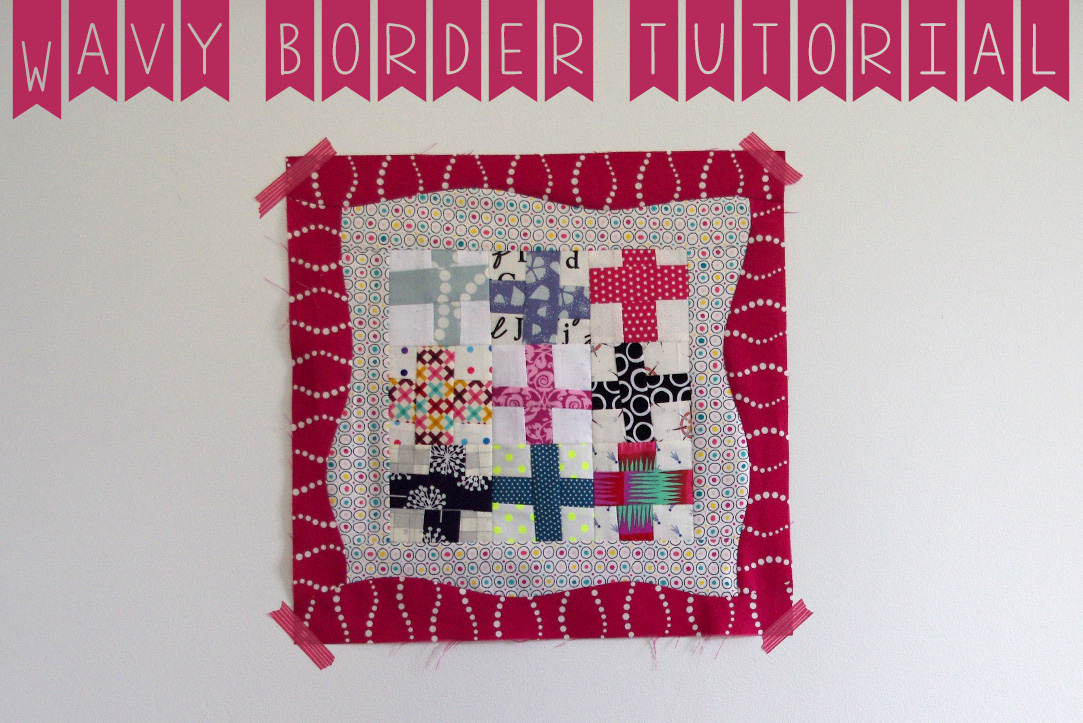
I wanted to share with you how I make wavy borders. It’s a great technique, perfect for a modern quilt and I love how it gives you a little mitred corner look. This technique is also used in the Modern Medallion quilt. My instructions below show a smaller block, however you can adapt it to any size and further instructions are provided in the Modern Medallion pattern for a larger quilt. Read on for the wavy modern quilt border tutorial.
Fabric and cutting guide:
[4] 3½” strips of inside border fabric
[4] 3½” strips of outside border fabric
Instructions:
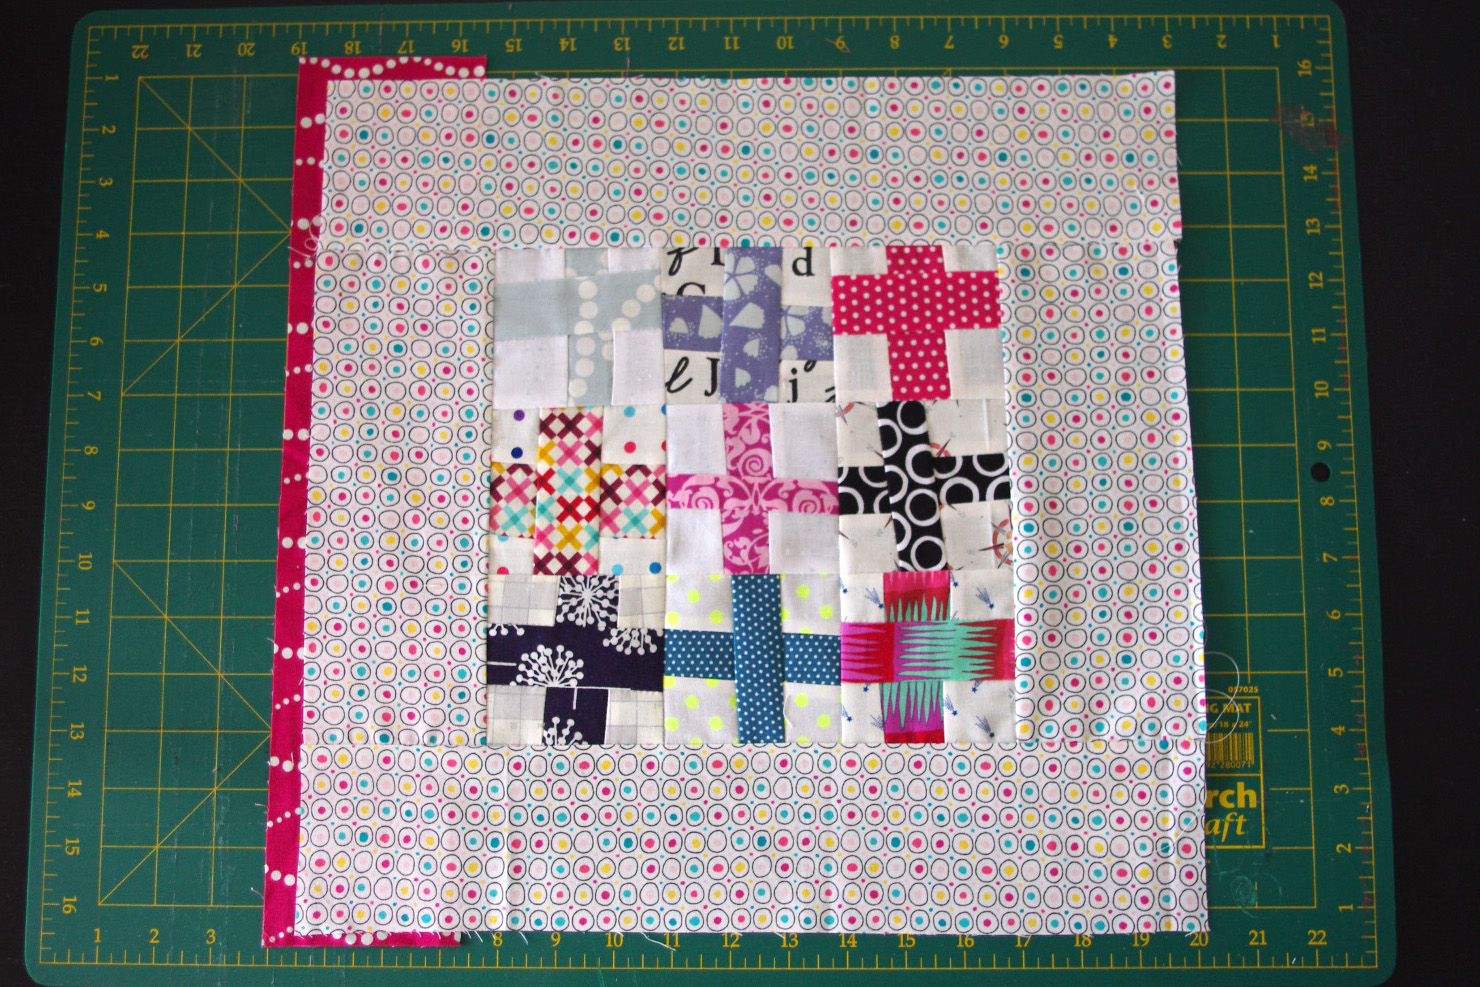
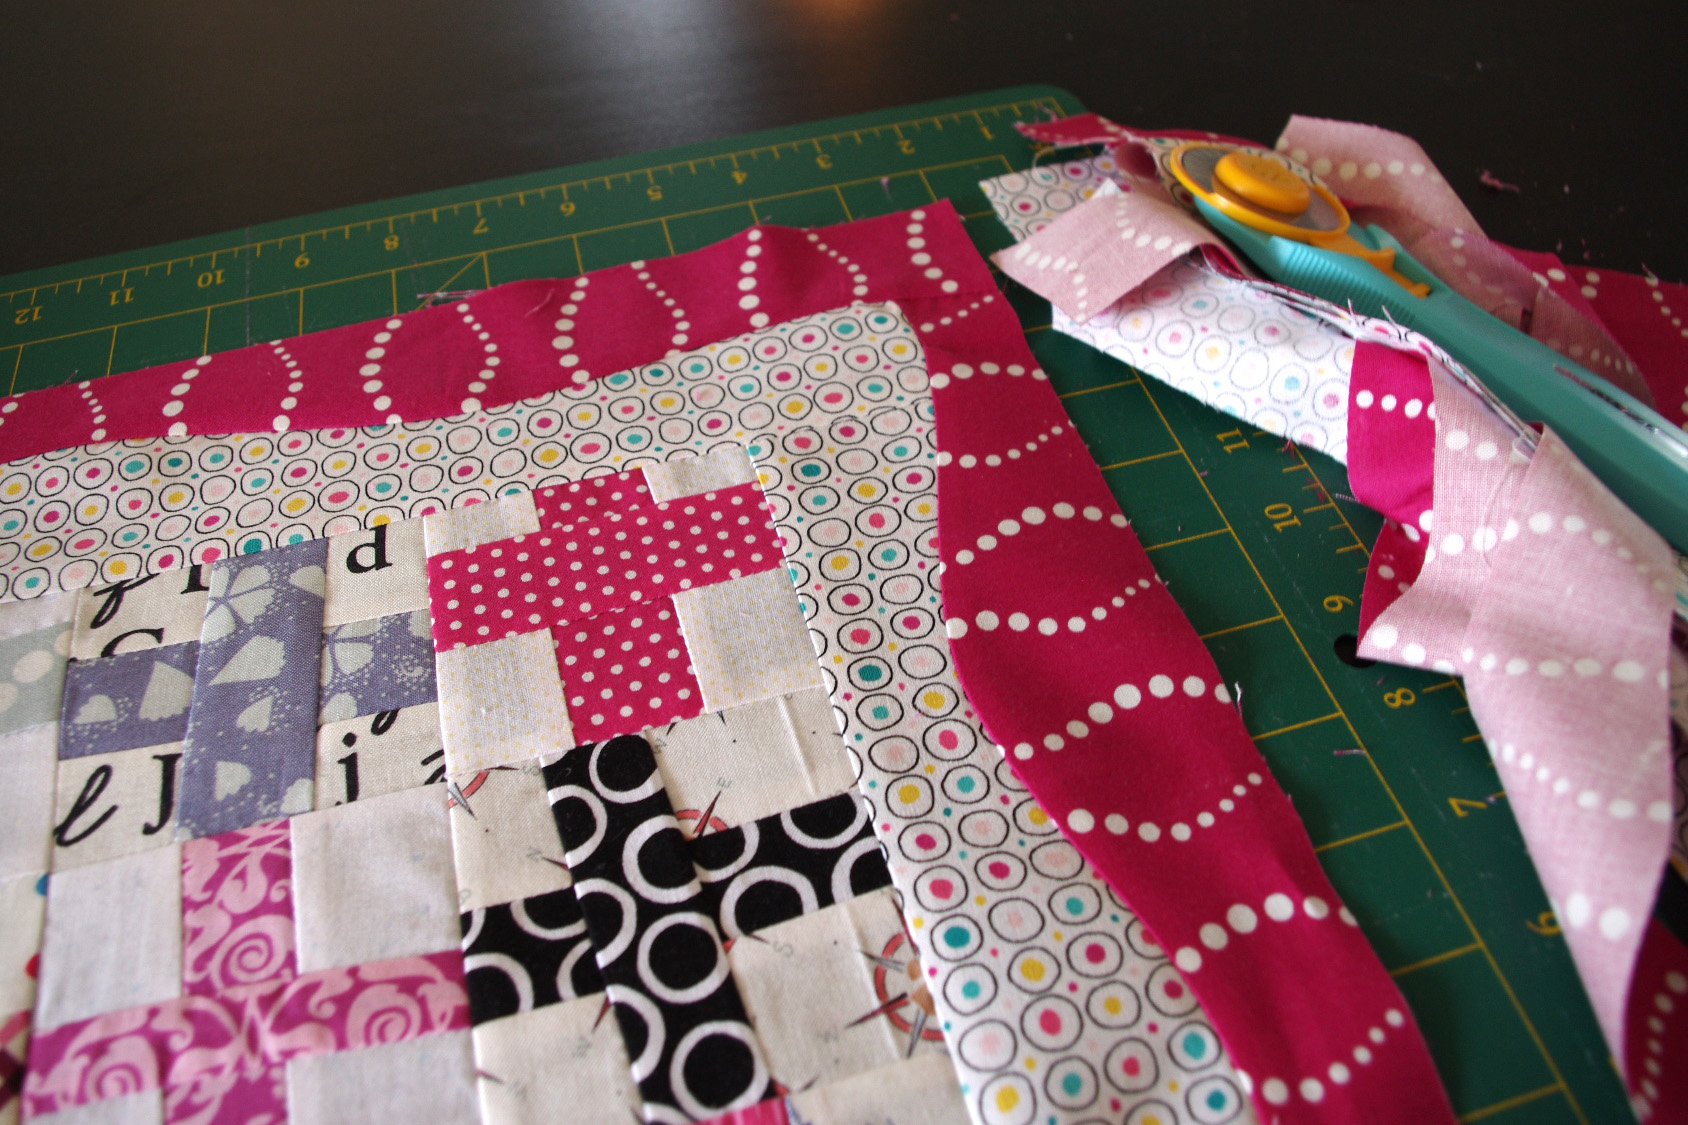
Step one: Attach two inside border strips to the top and bottom of your block. Trim back to the block size. Repeat with the sides of the block to complete your inside border. Cut the outside border strips back so they are just a little bit longer than you block size. Place the strip down on your rotary mat, with the block on top, both right side up.
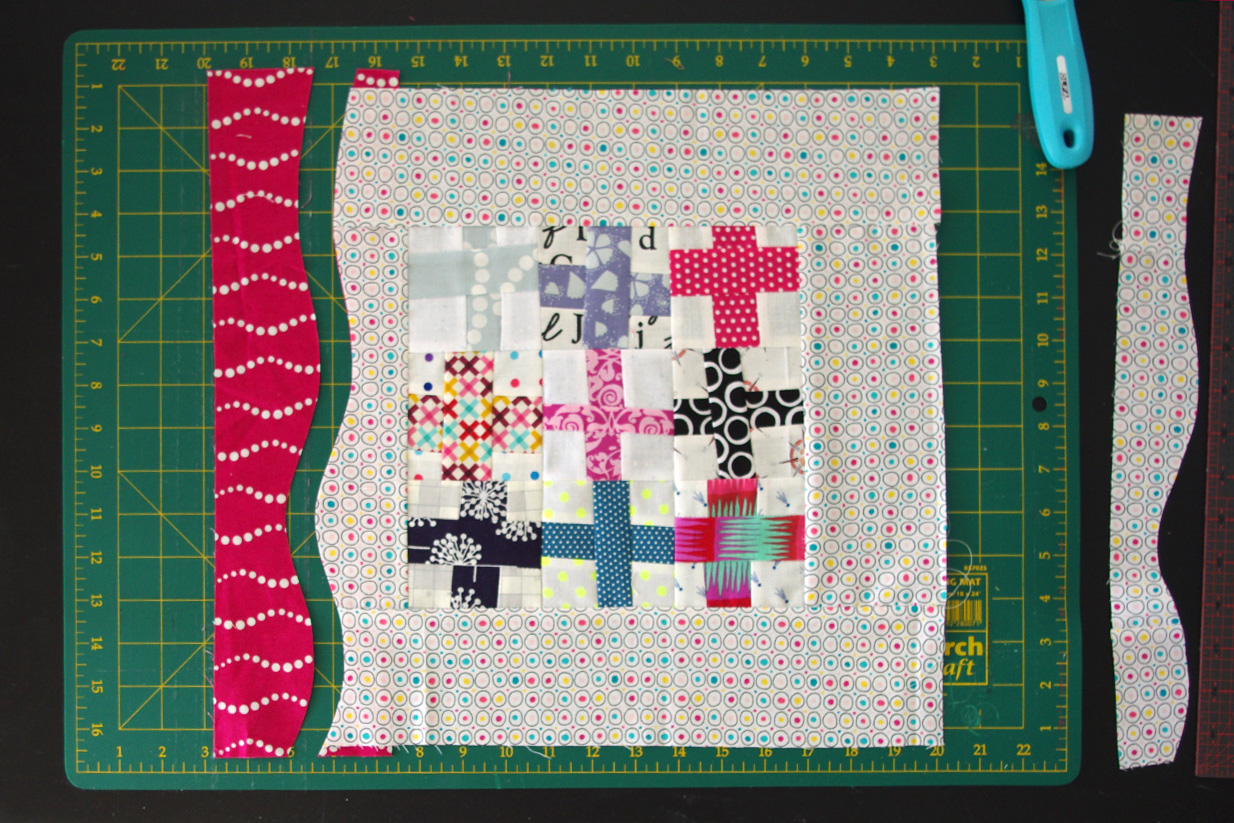
Step two: Cut a gentle wavy curve with the rotary blade. Discard the outer top of the inside border and the inner piece of the outside border, which should be under your quilt.
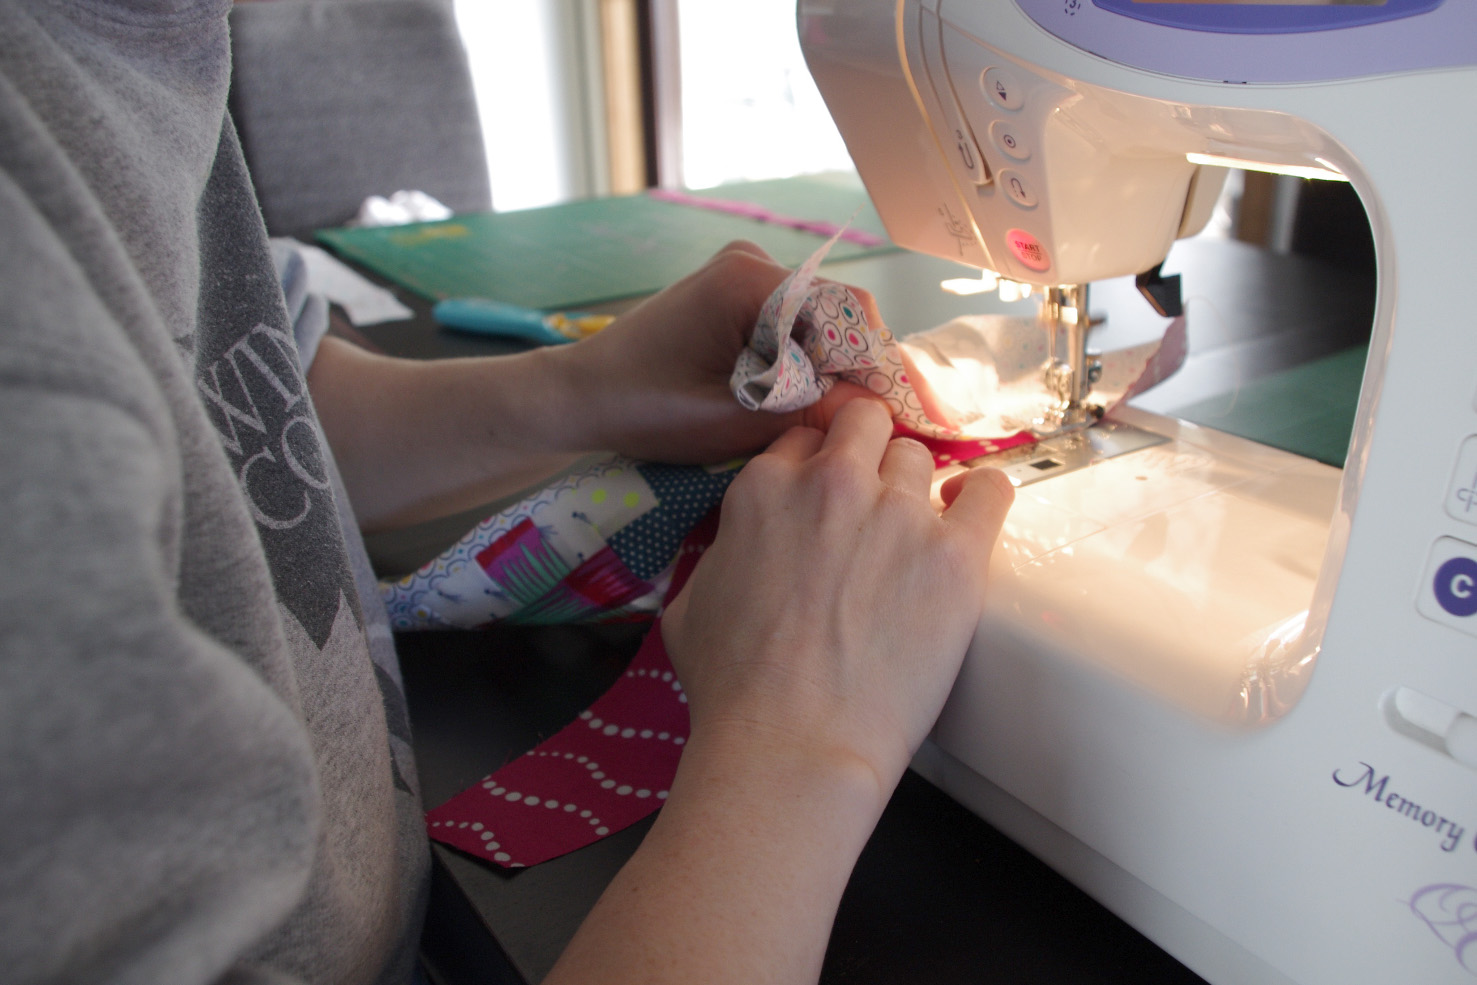
Step three: Sew the inside border to the outside border, down the curved seam (you can pin if you like, however I usually don’t). When you are looking at your curve, it will look wrong. It’s a curve and it’s supposed to! Don’t worry, it will make sense once you have sewn it! Gently manipulate the curve, without stretching the fabric, to fit and press well. Spray starch/Best Press if needed to get it lovely and flat.
When I sew my curves, I use the bottom fabric as a guide and hold the top fabric up and move it as I go. Doing it this way, means I don’t need pins and have a lot more flexibility.

Step four: Repeat step three on the opposite side of the quilt. Once the top and bottom borders are completed, repeat step three on both sides.
Step five: Trim the lock back to the desired size and you’re done!
Love your post, I have wanted to make a curved piece table runner, but was leary about making the cuts. Now I see you have made it look so easy, yet very technical..I am on the way to making curvy runners……..
Glad you like it! This techniques is truly simple yet effective 🙂
What a great tutorials. I’m doing this bit next and this makes so much more sense to me now! Thanks xx
I am trying to figure this out. Bear with me. 🙂 I am hand sewing so I can not cut seams that have already been sewn or all my sewing will come apart. I am looking at the pictures and the description in step ONE. I assume “attach” means sew. Right? So there are two ends that have sewn seams on the ends. Then when you lay it on top of a 2nd fabric and cut the sides that have those seams, you are cutting over sewed seams? Is this correct? If so, I have to figure out a different way to do this…
Keep me updated on how you go with the hand sewing!
You make it look real easy. Hope I get it right. Bought a quilting pattern with a wavy border and as I have never made a border like that I really wanted to make it but their explanation was not so clear. The border really makes the quilt.
Thanks Gwen! I would love to see your finished quilt with your wavy border when you have finished 🙂
[…] can see my tutorial here on how I do mine – it is really much easier than it […]
[…] have also posted a tutorial for the wavy border, if you are looking for a little extra guidance on that […]